
Toyota Sienna Campervan: Going Solar
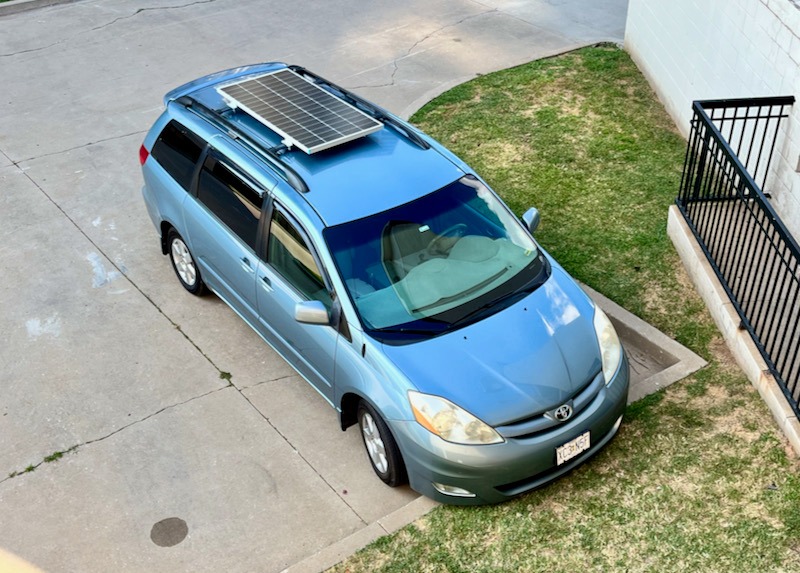
We've finally joined the #vanlife cool kids club. As you can see in the photo, we've added a solar panel to our 2008 Toyota Sienna DIY campervan.
Why did we wait nearly three years before jumping into the world of solar?
Money, basically.
This build started with constraints. MsBoyink and I had a limited budget and could only get away for a long weekend. A good cooler would keep ice for that long. If we needed to charge devices campsites with electric hookups were cheap enough to rent.
But much has changed over those three years.
I now have a remote job that's more flexible. It also has more vacation time. Our finances are in better shape. And the technology got cheaper and more convenient.
Phase Two Goals
No More Ice
The cooler worked as designed, but our usage changed. We were taking longer trips in the van. Chasing ice got old. It's not always easy to find. And no matter how hard we tried we always seemed to lose food due to water seeping into the packaging.
Watery hummus anyone?
Didn't think so.
Power Independence
I wanted to be able to stay in more rustic places. Mainstream campgrounds don't always offer the quiet seclusion we're looking for.
There are a range of more primitive conservation areas, wildlife management areas, and National Forest campgrounds. They'll often have fire rings and a pit toilet, but nothing else.
To stay in those places I needed my own source of power. Enough to support the fridge, a couple laptops, and various fans, lanterns, headlamps, etc.
Better Organization
The antidote to living in a small space is organization.
After using our current setup for a number of trips I saw opportunities to improve how we use the space inside the Sienna. We've learned that we need to leave with some empty space to accommodate purchases we make on the road (like Michigan produce not available in Oklahoma.)
The Solutions
There are many ways to build a solar system on a van or RV. Some people source all the individual parts and build a custom one-off solution.
I decided to hit the easy button instead.
Power Station
There's a bunch of these power stations on the market. They're a combination of battery, charge controller, and inverter. They have all the plugs and connections you need to charge your devices.
Some (like the EcoFlow Delta 2 I chose) even have a smartphone app where you can monitor the state of the battery and how much power you have coming in and out.
I bought a refurbished unit from the official EcoFlow store on eBay. The price was $200 less than Amazon, but I did have to settle for a two year warranty instead of five.
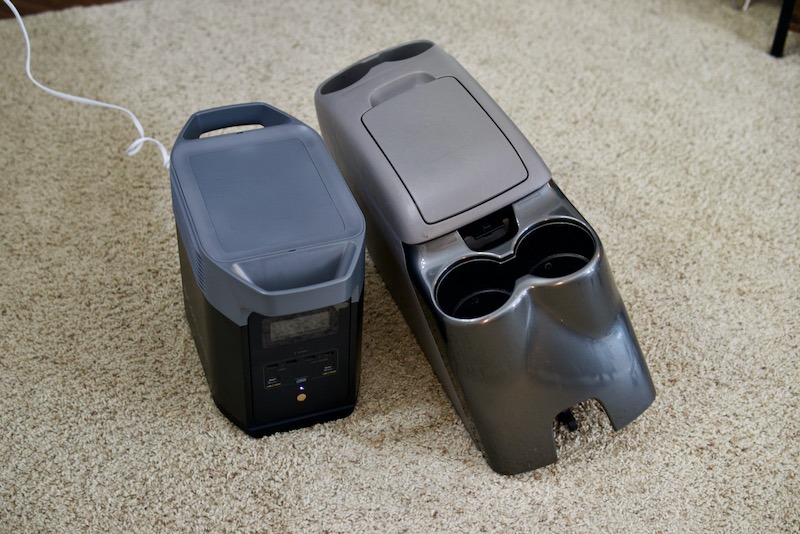
The only place to put the power station in the van was in place of the stock console between the front seats. I chose the EcoFlow because it fit nicely into that space and all of the controls were on the short ends where we could access them.
Mounting the EcoFlow
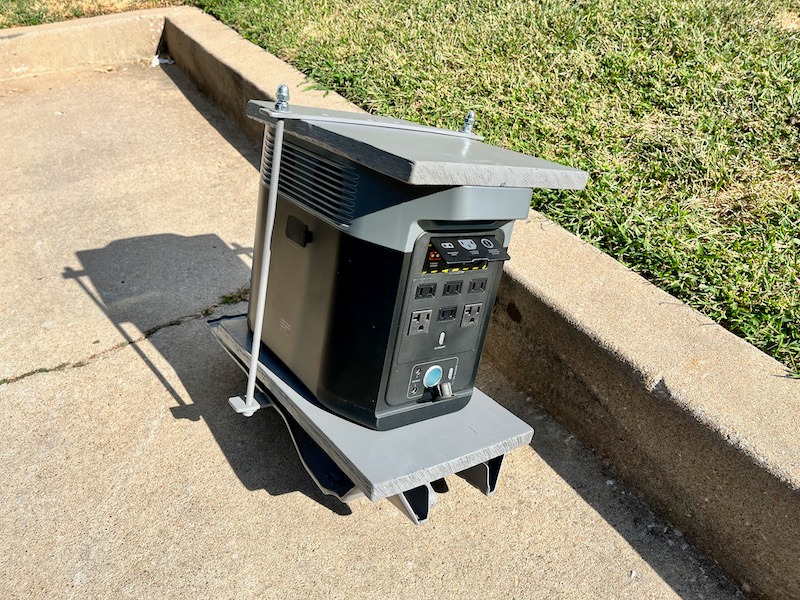
The EcoFlow Delta 2 weighs 27 pounds. I didn't like the idea of it just sitting loose on the floor. It'd be dangerous in an accident. I needed a way to secure it into the van.
The console hooked nicely into the van floor at the front and latched at the rear. I decided I could tear it down to just the metal baseplate and use that as the starting point for a power center mount. From there, I designed what's essentially a large clamp using threaded rod, metal straps, and wood pieces.
The result isn't Pinterest-pretty, but was the best way I could come up with to secure the EcoFlow using hand tools and working in the hallway of our apartment complex.
(See below for a photo of the EcoFlow in place between the van seats.)
Solar Panel
I only wanted to mount a single panel. I found listings for up to 330 Watt single panels, but no one seemed to have anything more than the standard 200 Watt panels in stock, so that's what I went with. The internet hive mind said it would provide enough power for our needs - and it should be easy enough to add some freestanding panels into the mix if they're wrong.
I bought a Renology version from Amazon, along with the mounting kit.
Mounting the Solar Panel
I was hoping to mount the solar panel all stealthy and flush with the Sienna roof rack side rails, but it was too big. I ended up mounting the panel on top of the stock Toyota crossbars:
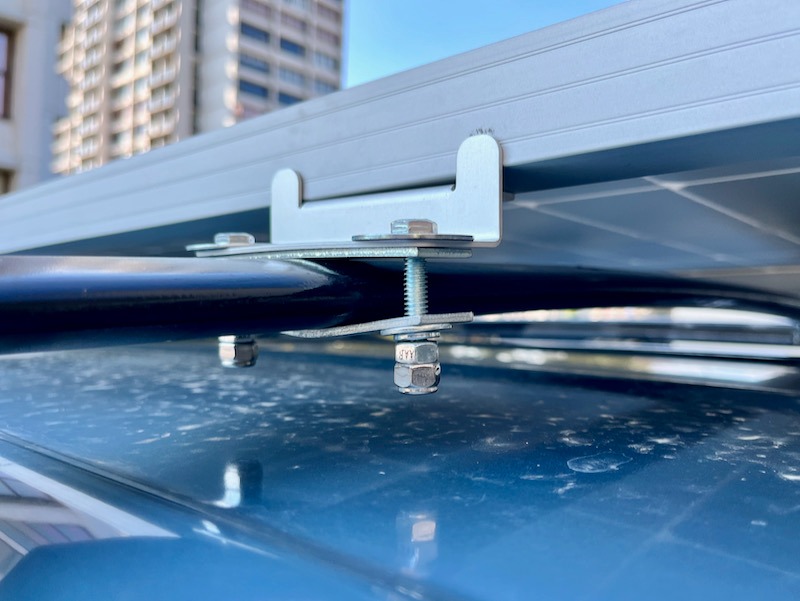
The upside is I can move the panel front to rear by just sliding the cross bars, and side to side by loosening up the feet. We may add things to the roof so it's nice to have the panel location be flexible.
12V Fridge
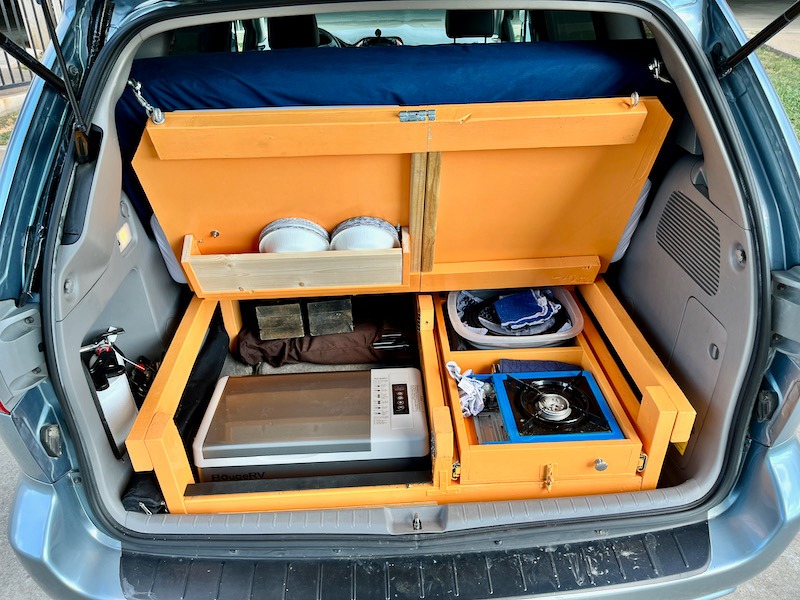
I chose a BougeRV 30 Quart refrigerator, mainly based on how it would fit into the space formerly occupied by our cooler:
I found the unit on the factory website for $100 less than Amazons price.
I was hoping for something a bit bigger, but since we don't have to load it with ice I'm hoping it'll hold a week-ish worth of food.
Better Organization
I added three spots for more organization. The first is visible above - the unpainted wood is a new cubby for kitchen supplies.
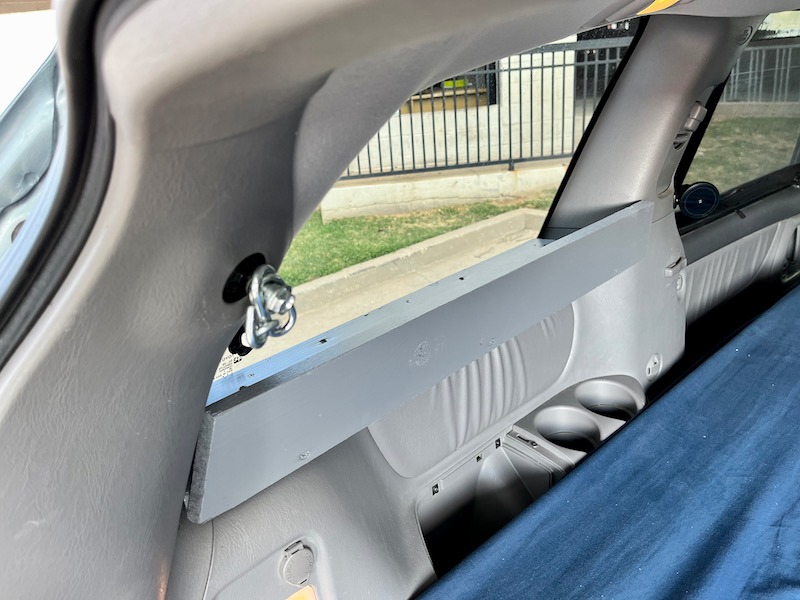
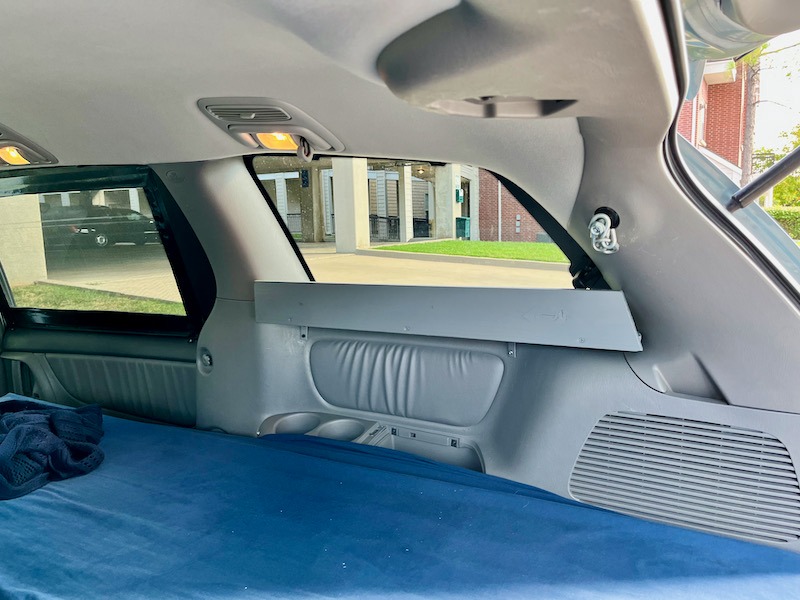
The second are these window-sill shelves for the rear quarter windows - for a packing cube with clothes, or an extra blanket for the bed, etc.
The third are these seatback MOLLE panels with an assortment of pouches:
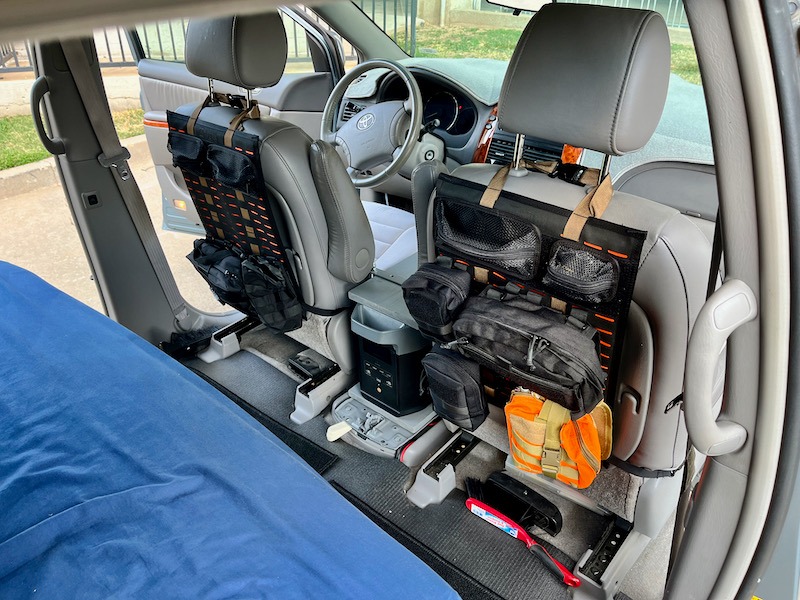
(Note EcoFlow unit mounted between the seats.)
If you aren't familiar with the MOLLE system, it's pronounced "Molly" and stands for MOdular, Lightweight Load-carrying Equipment. The system comes from the military/first responder world but the overlander community uses them too.
The MOLLE seatback panels are from Blue Ridge Overland Gear and the bags are all from Amazon. We currently have bags for our bathroom/shower supplies, binoculars, window screens, an assortment of charging cables, a headlamp, and a water bottle.
Some pouches secure to the seatback using straps and some attach with velcro. The bigger bags also have velcro, so you can rip and stick bag combinations together if necessary.
Phase Two Costs
I had budgeted $2000 - $2500 for these upgrades, and I'm happy to come under that:
$669 - EcoFlow DELTA 2 Portable Power Station
$221 - BougeRV 30 quart 12v Fridge
$215 - Renology 200W solar panel
$300 - Seatback panels/pouches
$100 - Wood/paint/misc hardware
---------
~ $1500
Upcoming Trips
We're headed to Michigan in early October for our son's wedding. Late October-early November we're hoping for some regional camping around Tulsa, Oklahoma. We're planning a longer trip over Thanksgiving but haven't decided where yet - I'm waiting to see what the weather is going to be.
We're excited to see what these upgrades do to improve our #vanlife experience!
1 Comment Add a Comment?
PS
We are looking into alternative power sources…so Thank You for all your input!