
Toyota Sienna Camper Van - Budget Build
What do former fulltime RVers do when they get off the road, buy a house, then get the travel itch?
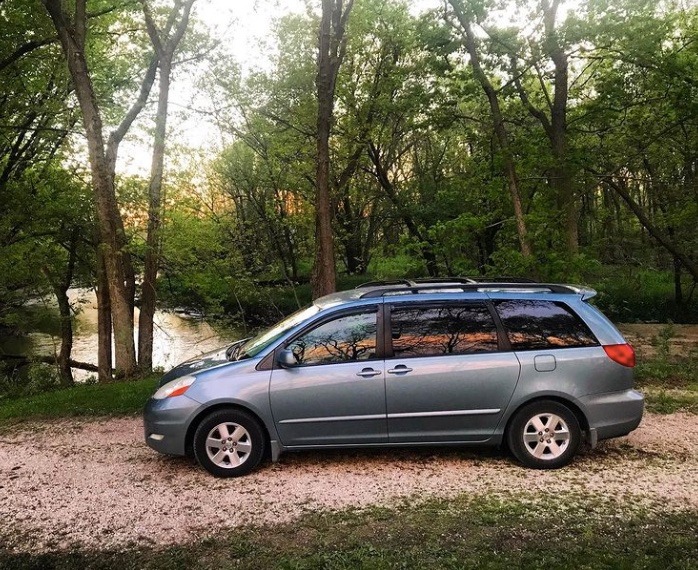
In our case, it turned out to be building our own camper out of a soccer-mom minivan.
Read on for why we chose the van we did, details about the floorplan, what gear we outfitted the van with, how it's worked, and what we're doing to it next.
(Note: that most links are Amazon Affiliate links).
Why a Toyota Sienna?
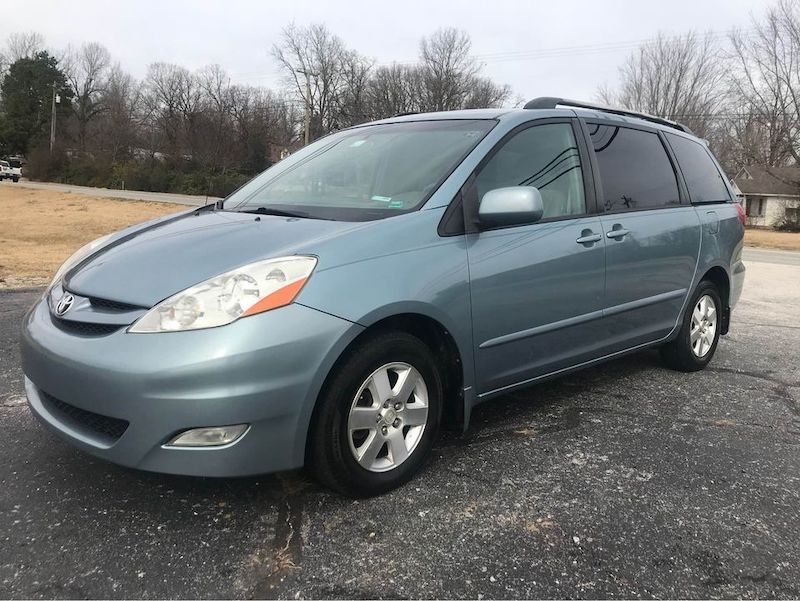
We chose a 2008 Toyota Sienna as our base rig because it seemed like a popular choice with other DIY campervan builders. We even found aftermarket companies building custom kits for them.
The Siennas have a good reputation for reliability, often going 300K miles or more. They've been around a number of years, availability was good, and there were even all-wheel-drive versions.
We scoured the local listings and found a 2008 version for sale a short drive away. It had 185K miles, recent maintenance, drove well, looked clean, and was priced fairly. It was the first van we looked at but I didn't see any reason to keep looking. A few days later it was in our driveway.
Campervan Goals
At the time, MsBoyink and I each had jobs that we enjoyed, but didn't pay well. Our budget wasn't huge. We also couldn't get away for much more than a long weekend.
So I didn't want to pay for camping. I wanted to stealth camp on city streets, in hotel parking lots, or in rest areas.
And the van only had to support us for three nights maximum.
Design Philosophy
Spend any time on YouTube and you'll see a a huge variety of campervan builds. Some people do a "no-build" approach using cots and plastic drawers from Walmart. Others completely strip the van down to the metal walls, add insulation, and build new walls with custom cabinets.
I didn't want to spend a year building the van before we could use it.
I'm no craftsman when it comes to woodworking, but I had shop space, basic power tools, and the willingness to see what I could do.
So I decided on a moderate-level build with a basic folding bed frame and kitchen drawer, all made from standard lumber.
Basic Sienna Campervan Floorplan
I started with three main goals for the floorplan:
- A fullsize bed.
- Space between the front seats and the bed (for entry, sitting at the end of the bed, access to storage under the bed, etc)
- A kitchen space with shelves, pantry, sink, and stove.
After looking at dozens of other van builds with front kitchens and rear kitchens, verifying bed sizes, and measuring the van, I realized I could only have two out of those three (I'm convinced some of those really cool van builds are owned by very short people.)
I found a design that solved the puzzle by putting the kitchen under the rear of the bed and decided it would work for us.
Outfitting the Toyota Sienna Campervan
Bed Platform
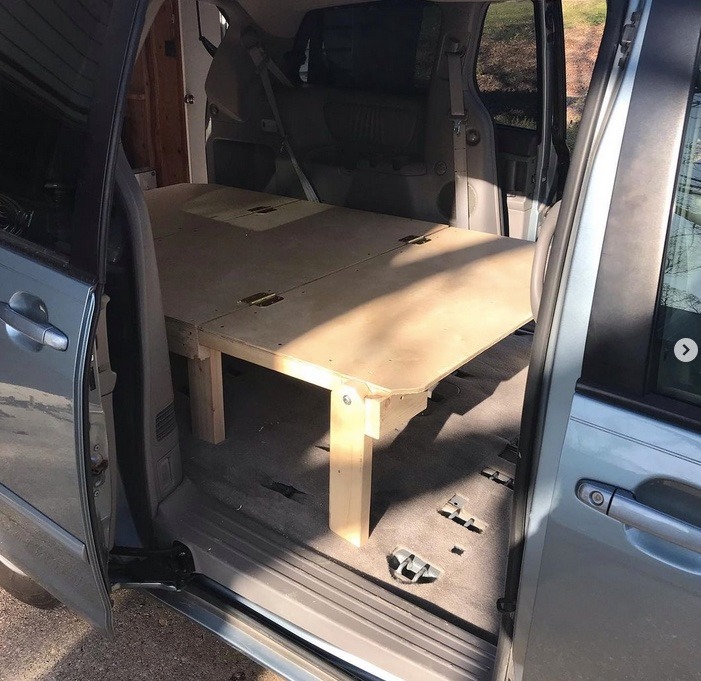
The bed platform is in three sections. The middle section is fixed, and the front and rear sections are attached with hinges.
Hinging the rear section gives access to the cooler and food pantry down in the deep "trunk space" where the original Sienna third row seats stowed.
Hinging the front section allows it to fold backwards, opening up the middle space of the van for access to under-bed storage or to carry something large.
I used simple door hinges, so by pulling the center pin out of the hinge I can remove the entire bed section.
Bed Mattress
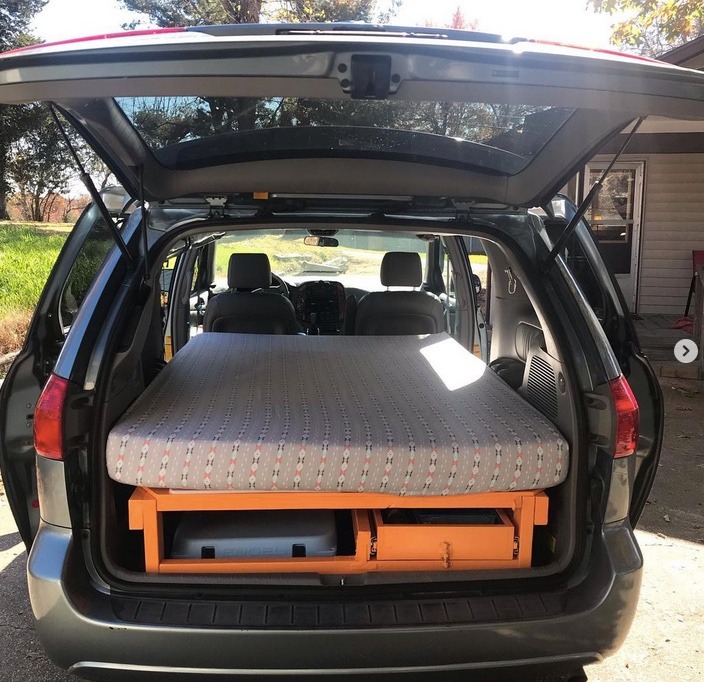
I bought a 5" deep fullsize foam mattress cut into three bed cushions from the Foam Factory.
I put them into a mattress protector to keep them together but still allowing the ends to fold up.
Bed Height
Choosing your bed height is crucial in these types of builds (note how many builds use a thin mattress, or don't show the mattress, or don't show the owners actually in bed.)
I needed it high enough to allow for a rear drawer, but not so high that we didn't have room to sit up in bed.
I choose to put the bed platform at one foot off the Sienna floor. With a 5" foam mattress we're a bit closer to the ceiling than I'd prefer, but I can still sit up.
This spacing left me 6" of room for a kitchen drawer.
Clothes Storage
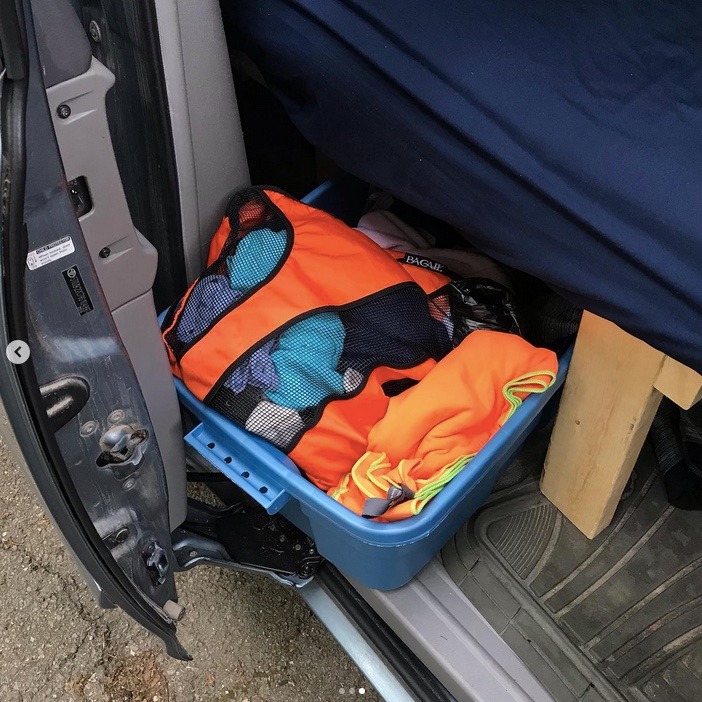
We use plastic storage bins that slide under the front of the bed from the sides, accessible through the side doors of the Sienna. There is another bin in the middle that slides in from the front.
We use soft-sided packing cubes to organize our clothes in the bins.
Cold Food Storage
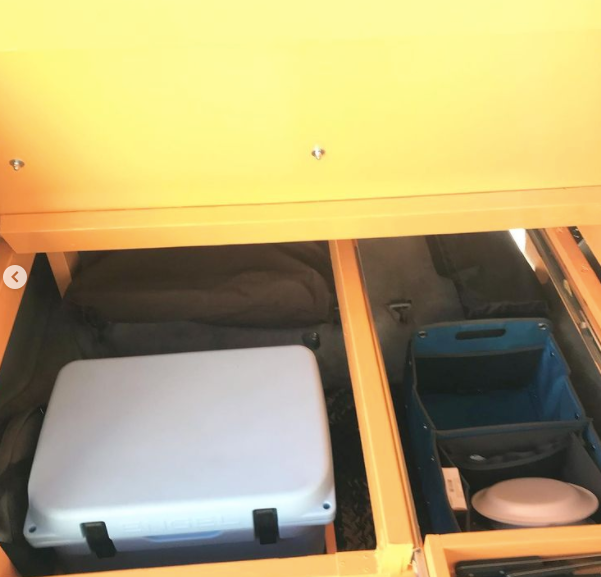
For this weekender build we went with a simple, high-quality 21-quart cooler. It's located under the bed on the left side.
The cooler moved around during transit, so I made a simple wooden frame for it to nestle into. This also created some additional storage cubbies for things like jumper cables, disc golf sets, tarps, etc.
Dry Food/Pantry Storage
For coffee, paper products, dry food, etc. we use a foldable storage box leftover from our RVing days.
It's divided in two and has mesh pockets for more organization.
Sink/Water
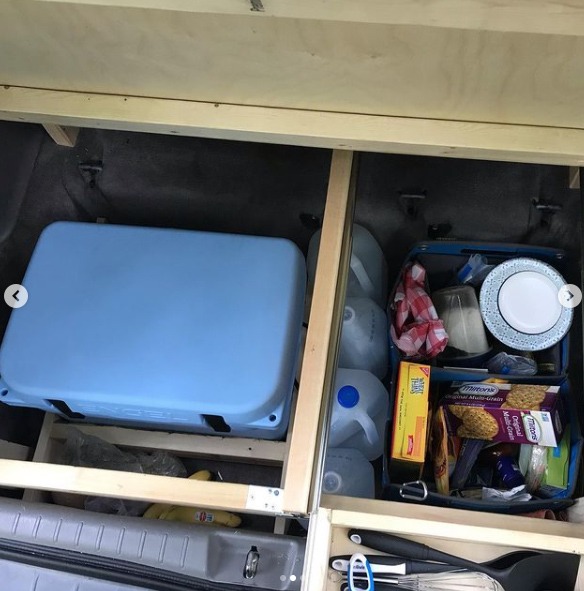
So many van builds feature sinks, tanks, and 12v pumps with fresh water delivery and gray water management. I spent hours trying to fit such a system into this little Sienna.
Then I realized when we tent camped we just used one-gallon water jugs. They were cheap to buy, available everywhere, and not heavy to carry like a five-gallon jug. Grey water management was just watering the closest bush.
I found room for (4) one-gallon jugs between the cooler and food storage. We use a collapsable dishpan for a sink. During transit it holds our cookware, with dishtowels layered in between to prevent rattles.
Cooking Supplies
I put one of these butane stoves in the pull-out drawer. I added one of these folding windscreens for breezy conditions.
This cookware set with a removable handle works great, but I did add this lid to heat things up faster.
For coffee I just heat up water on the stove and then use this simple pour over filter holder.
For other kitchen utensils, knives, etc. I went crazy at the local Dollar Store.
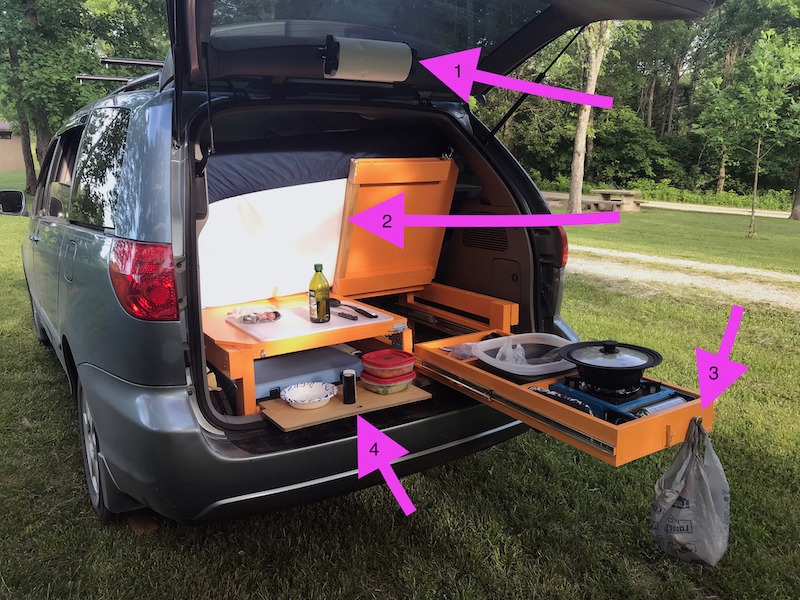
Photo shows kitchen upgrades including:
- Paper towel holder
- Split rear section (was one piece at first)
- Hook for trash bag
- Additional small table
Bathroom
For toiletries we use these bags which hang from stock hooks on the back of the Sienna passenger seat.
I also bought one of these folding toilets and hoped to have enough room to set it up inside if the situation demanded.
Shower
With only being gone for three nights, I didn't plan for a shower. I figured we could stop at a truck stop if needed to.
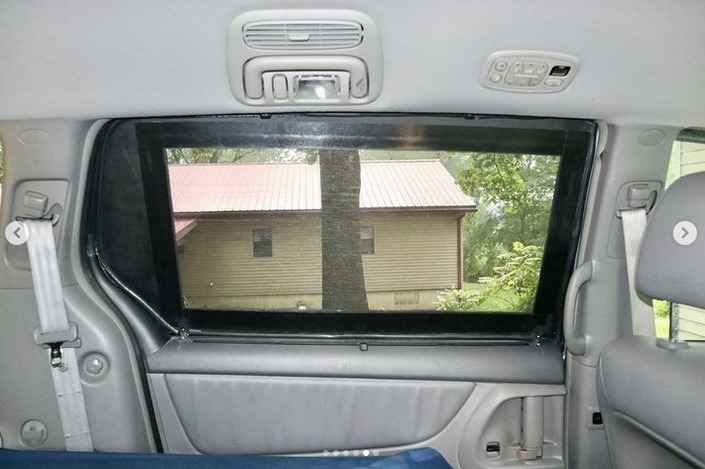
Privacy
I did what 99% of van builders do and made window plugs out of Reflectix .
Well, mostly.
After two failed attempts at cutting Reflectix for the front windshield I gave up and bought a Weathertech precut sunshade.
Window Screens
I made some leave-in screens for the middle windows using 1/8" plywood, screen material, and duct tape.
I edged them with rubber hose slit lengthwise, and installed them with angle brackets.
They were time consuming, fussy, and expensive to make. If you want screens for the middle windows of your van, search for alternative approaches just using a number of small magnets to hold a section of screen in place.
Camp Chairs
Vanlifers seem to struggle to find the find the perfect campchair. If it's not your standard Walmart bag chair, it's one of these backpackers chairs that disassembles and folds up to the size of a loaf of bread.
Which would be cool, if only either option were comfortable for longer than it takes to roast a marshmallow.
We're die-hard fans of the classic Zip-Dee folding chairs. They fold up to only 2" deep, unfold in two seconds, have wooden arms you use to get up, and are comfortable for hours. You can usually find used versions on eBay for roughly half of the price of new ones. Expect to pay ~$100 per chair.
I designed our bed frame to accomodate storage of the Zip-Dee chairs in front of the cooler. I even have room to store things like wooden leveling blocks on top of them.
Campervan Cost?
I didn't keep a detailed spreadsheet of costs while building our little Sienna campervan.
But overall I'd estimate our total build cost at ~$1500. Add in the price of the used Sienna and we're well under a $10K investment.
Not bad - especially when you consider that for that we also get a daily driver.
Giving Up On Stealth Camping

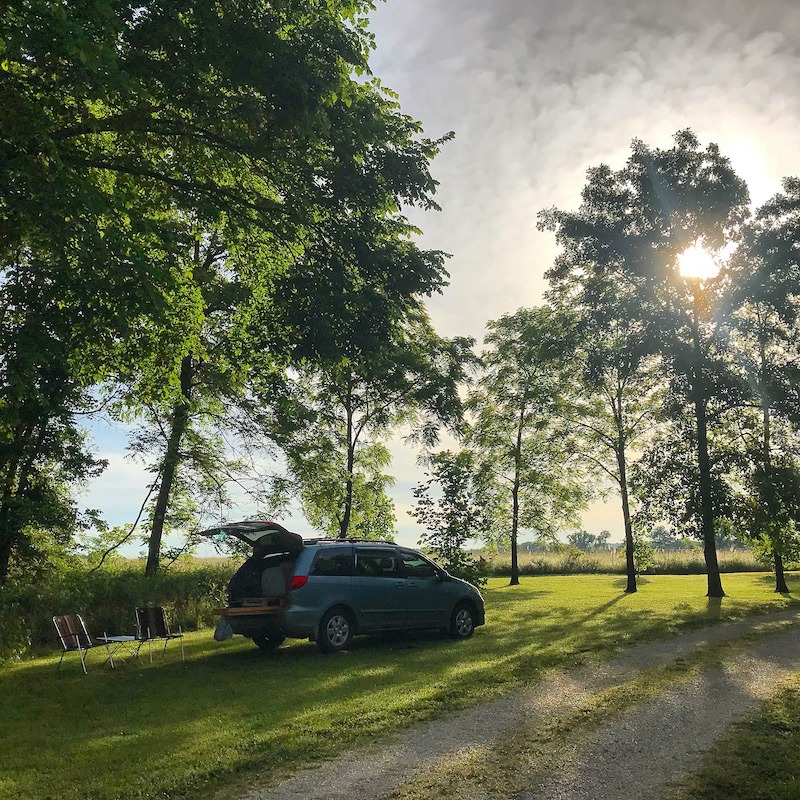
We've used this van a ton. It's taken us to 18 states. It's cool to have something you can sleep in that you can also drive 85 MPH while getting 23MPG.
But I built this van to be a weekender/stealth camper and in that regard it's a failure.
More accurately, I'm the stealth camping failure.
- I don't sleep well in stealth mode. Basically the more windows we plug up the worse I sleep. Any noise or traffic or voices will keep me awake.
- I have a hard time falling asleep if there's any chance we'll get rousted out of the spot.
- Setting up the toilet is too much of a hassle.
- Without a house battery, solar, or charge station we have a number of batter-powered devices to worry about.
All in all, I can solve all of these issues (plus get a shower) by just spending the money and booking a campsite.
We've camped in National Forest campgrounds, county parks, Conservation Areas, and state parks. My main resource for finding low-cost camping is FreeCampsites.
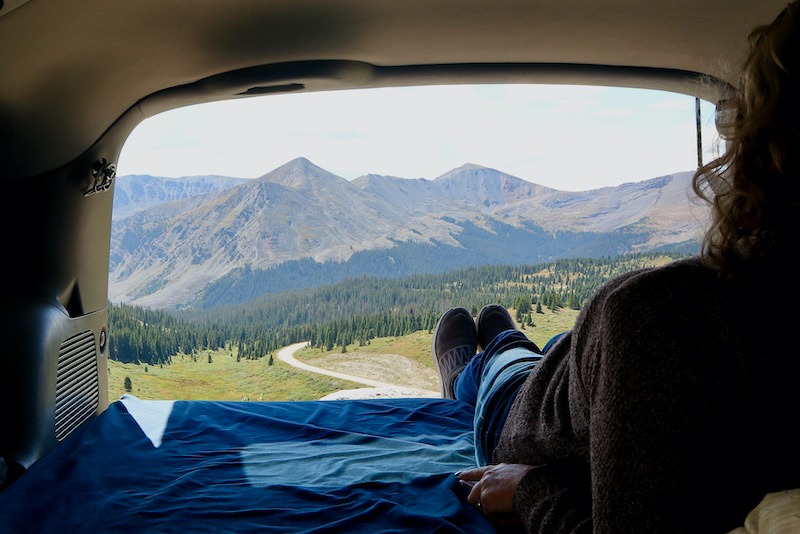
A New Job Changes Things
We also quit working for the newspaper that limited our time off. I got a remote job which has more vacation time and allows for flexible hybrid work/vacation trips.
So we're taking longer trips in the van. And we're tired of chasing ice. And wanting more independence from shore power.
I was starting to scheme up an entirely new camper based on a 4WD Chevy Suburban so we could camp in more rustic places.
But this little Toyota still looks good, runs good, doesn't burn oil, and is mostly built out.
It's also a much better city daily driver here in Tulsa than a big Suburban would be.
Toyota Sienna Campervan Phase Two
So in spite of my thoughts of "the next rig" we recently decided to keep the Sienna and invest in a a "phase two" revision with the main goals of:
- Replacing the cooler with a 12v fridge.
- Installing a portable power station.
- Installing a solar panel to charge the power station.
- Various other organizational and convenience improvements.
It'll be a couple of months before all this is done - but I'll be back with an update when it's all good to go.
Here's that phase 2 update.
1 Comment Add a Comment?
Andrea Elkins
Love the detail, you did a great job! Looking forward to seeing the next phase.